Pool Tile Installation Plans (2026): A Structural Engineering Guide
The installation of tile within an aquatic environment represents the most rigorous application of ceramic and glass science in the modern construction industry. Pool Tile Installation Plans . While interior tiling is primarily concerned with aesthetic alignment and minor moisture management, the waterline of a swimming pool is a volatile boundary where materials are simultaneously subjected to hydrostatic pressure, aggressive chemical oxidation, and intense ultraviolet radiation. For the architect or property owner, the technical integrity of this transition zone is what separates a long-term asset from a recurring structural liability.
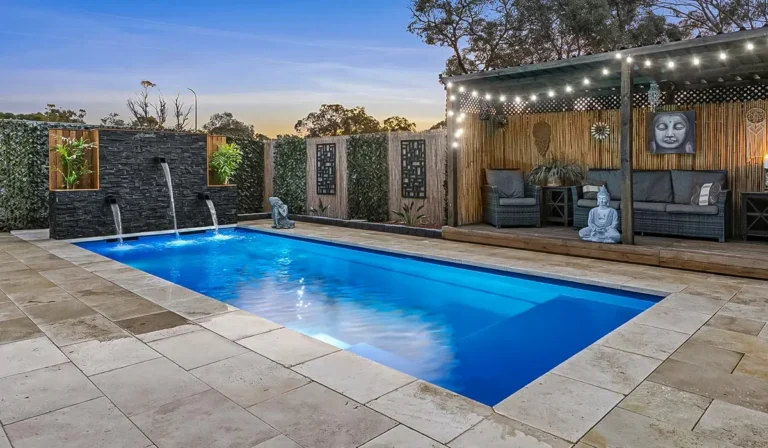
The complexity of contemporary aquatic architecture has moved beyond the simple six-inch blue ceramic band of the previous century. We are now in an era of full-interior glass mosaics, large-format porcelain slabs, and “vanishing edge” weirs that require mathematical precision in their leveling. Consequently, a high-fidelity installation is no longer a localized cosmetic task; it is a multi-layered engineering process that begins with the chemical preparation of the concrete substrate and ends with the molecular curing of epoxy-based grouts. Failure at any point in this chain does not merely result in a loose tile; it invites moisture migration into the pool’s bond beam, leading to rebar corrosion and the eventual delamination of the interior finish.
Navigating the landscape of modern aquatic finishes requires an analytical mindset that prioritizes “invisible” prep-work over the visible final product. As regional climates in the United States become more extreme, the demand on the “bond-line”—the microscopic interface between the tile and the pool shell—has never been higher. This article serves as a definitive exploration of the systemic requirements for high-performance aquatic finishes, providing a framework for those who view their property as a permanent architectural legacy.
Understanding “pool tile installation plans”
To successfully architect pool tile installation plans, one must first acknowledge that the tile is merely the “aesthetic skin” of a much more complex “structural body.” A pervasive misunderstanding among luxury homeowners is the belief that the durability of a pool’s finish is dictated by the cost of the tile itself. In truth, the longevity of the installation is governed by the quality of the waterproofing membrane and the “open time” of the polymer-modified thin-set used during the bond phase. A “best-in-class” plan is defined by its ability to resolve the tension between the rigidity of glass or ceramic and the inevitable movement of a concrete shell.
Evaluating these plans requires a forensic look at three distinct layers:
-
Substrate Geometry: Ensuring the “bond beam” is perfectly level and “plumb.” In a vanishing-edge pool, a deviation of even one-sixteenth of an inch over twenty feet will cause visible “dry spots” on the weir.
-
Chemical Compatibility: The selection of adhesives that can withstand constant immersion in water with a high “Saturation Index.” Traditional mortars often “soften” over a decade of immersion; modern plans require high-performance epoxies.
-
Thermal Elasticity: The ability of the grout joints to act as “shock absorbers.” As the sun hits the waterline tile while the pool water remains cool, the resulting thermal stress can shear the bond if the grout is too rigid.
Oversimplification in this sector often leads to the “direct-bond” error—applying tile directly to a raw gunite shell without a “leveling coat” or “brown coat.” This ignores the porous nature of concrete, which can leach minerals through the grout, creating unsightly white deposits known as efflorescence. A comprehensive plan accounts for this by introducing a vapor-barrier layer that isolates the tile from the structural concrete.
Contextual Background: The Evolution of Submerged Adhesion
The history of American aquatic tile is a transition from the utilitarian to the ethereal. In the 1960s and 70s, “pool tile” was synonymous with heavy, six-by-six-inch ceramic squares. These were designed for one purpose: to allow for easy cleaning of the “scum line” where body oils and debris collect at the surface. The installation methods were rudimentary, often relying on simple portland cement and sand, which worked only because the tiles were thick and the pools were over-engineered.
The 1990s introduced the “Glass Revolution,” where translucent mosaics became the hallmark of luxury. However, this aesthetic shift brought significant technical challenges. Glass is non-porous; unlike ceramic, it cannot “grab” onto traditional mortar. This forced the industry to develop specialized “Glass Tile Thin-sets” with high polymer content to create a chemical bond rather than a mechanical one.
Today, in 2026, the focus has shifted toward “Systemic Integration.” We no longer look at tile as a standalone feature but as part of an integrated waterproof envelope. Modern installations utilize “uncoupling membranes” and “multi-component epoxy grouts” that are impervious to the acid-wash cycles and salt-chlorine environments that defined the early 2000s.
Conceptual Frameworks and Mental Models
To evaluate the technical merits of a proposed installation, designers utilize several core mental models:
-
The “LSI Stability” Framework: The Langelier Saturation Index (LSI) measures how “aggressive” or “saturated” the water is. This framework posits that if the water is “hungry” for calcium, it will eat the grout out of the tile joints. A successful installation plan must include a post-construction water-balance protocol to protect the new tile work.
-
The “Mechanical vs. Chemical Bond” Model: Ceramics provide a mechanical bond (the mortar enters the pores of the tile). Glass requires a chemical bond (the adhesive sticks to the surface). Knowing which bond type is dominant dictates the selection of the thin-set.
-
The “Vapor Drive” Framework: This model examines how water vapor moves from the moist soil, through the concrete pool shell, and out toward the tile. Without a waterproofing membrane on the “positive side” (the water-facing side), this vapor drive can cause the tile to pop off from the back.
Key Categories of Aquatic Tile and Material Trade-offs
The selection of materiality is the first major decision point in any pool tile installation plans, and each category carries specific engineering requirements.
Decision Logic for Material Selection
If the pool utilizes a salt-chlorine generator, the logic dictates avoiding natural stones like Travertine at the waterline. Salt will crystallize inside the stone’s pores (subflorescence), eventually causing it to “spall” or flake away. For high-salt environments, a high-density porcelain or a non-porous glass is the only technically sound choice.
Detailed Real-World Scenarios Pool Tile Installation Plans
Scenario 1: The “Freeze-Thaw” Modernist Pool (Chicago)
-
Constraint: Winter temperatures drop to -15°F, while summer tiles hit 110°F.
-
The Strategy: Using small 1×1 glass mosaics with wide epoxy grout joints.
-
Reasoning: The high density of grout joints provides “micro-flexibility” across the surface, preventing the large-scale cracking that would occur with a single massive slab.
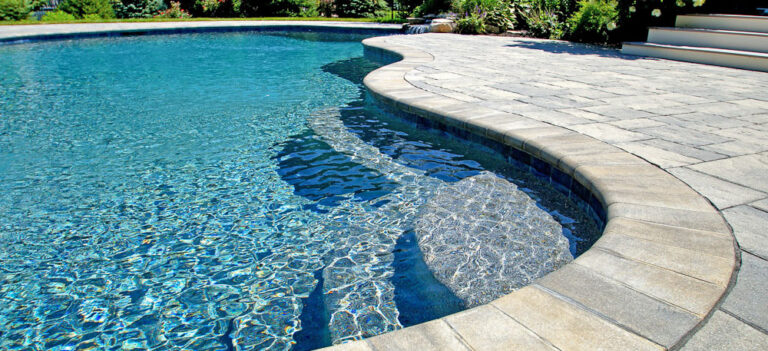
Scenario 2: The “Vanishing Edge” Infinity Pool (Malibu)
-
Constraint: The tile must be perfectly level to ensure a uniform “sheet” of water.
-
The Strategy: A three-stage “Brown Coat” leveling process using a laser-guided screed.
-
Failure Mode: If the installer skips the leveling coat and tries to “build up” the tile with extra thin-set, the adhesive will shrink as it cures, pulling the tile out of level and ruining the infinity effect.
Planning, Cost, and Resource Dynamics
The economic profile of a tile installation is often “bottom-heavy,” with the majority of the value residing in the labor and the chemical components rather than the tile itself.
Opportunity Cost: Choosing a standard cementitious grout over a high-grade epoxy grout to save $1,500 during construction is a significant strategic error. Epoxy grout is impervious to chemicals and will not stain or erode, potentially delaying a “re-grout” project by fifteen years.
Tools, Strategies, and Support Systems
A world-class aquatic tile installation is supported by a specific technical “stack”:
-
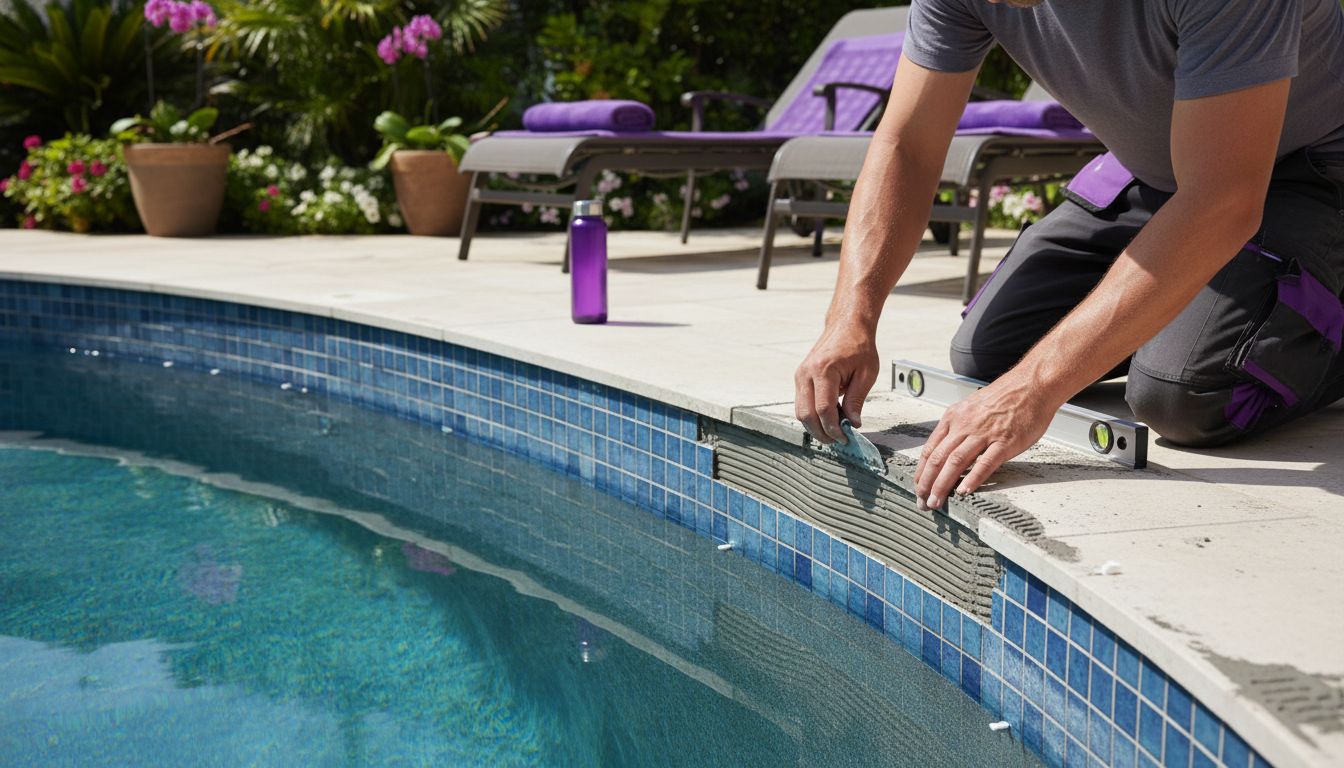
Notched Trowel Management: Ensuring “100% transfer” of thin-set to the back of the tile. Air pockets behind a tile will collect water, which can freeze and pop the tile or provide a breeding ground for black algae.
-
Surface Primers: Using “bonding agents” like Weldbond or specialized primers that allow new mortar to stick to old, cured concrete.
-
Epoxy “Float” Technique: A method of applying grout using a rubber float at a 45-degree angle to ensure the joints are packed “full-depth” without air voids.
-
Laser Leveling Systems: Multi-plane lasers that project a constant level line around the entire perimeter, essential for vanishing edges.
-
Submerged Curing Protocols: The “hydration” phase where the pool is kept empty for a specific number of days to allow the grout to reach its full chemical resistance before being submerged.
Risk Landscape and Failure Modes
The “Risk Taxonomy” of an aquatic finish involves compounding failures that often remain invisible for the first twenty-four months:
-
The “Efflorescence” Mode: Water leaches minerals from the concrete, creating white crusts on the tile. This is a sign of a failed or missing waterproofing membrane.
-
Iron Spotting: Occurs when natural stone tile contains trace amounts of iron that oxidize in the presence of chlorine, leading to permanent rust stains.
-
Bond Failure (Adhesion Loss): Usually caused by “skinning over” of the thin-set during a hot day. If the installer spreads too much adhesive at once, the surface dries, and the tile merely “sits” on top rather than bonding.
-
The “Step-Crack”: A diagonal crack following the grout lines, indicating that the structural shell of the pool is shifting or settling.
Governance, Maintenance, and Long-Term Adaptation
An aquatic finish requires a “Governance Protocol” to reach its intended thirty-year lifespan:
-
Quarterly LSI Audit: Ensuring the water is not “scaling” (leaving white crust on tiles) or “etching” (eating the grout).
-
The “Tap Test”: Every two years, a professional should lightly tap the tiles with a wooden handle. A “hollow” sound indicates the bond is failing, and the tile should be reset before it falls off.
-
Waterline Scrubbing: Utilizing a soft brush and a dedicated tile cleaner (not household detergent) to remove the “bio-film” that can protect algae from chlorine.
Adaptation Triggers: If more than 5% of the tiles exhibit “hollow” sounds or if grout erosion exceeds 2mm in depth, the governance logic suggests a proactive “re-grout and reset” rather than waiting for a catastrophic failure.
Measurement, Tracking, and Evaluation
-
Leading Indicator: “Grout Recess.” Measuring the depth of the grout joint over time. If the grout is becoming deeper, the water chemistry is too acidic.
-
Lagging Indicator: “Calcium Nodules.” Small white “volcanoes” coming through the tile joints, indicating that water is moving behind the tile and leaching calcium from the mortar bed.
-
Qualitative Signal: “The Glisten Test.” On a sunny day, if glass mosaics appear “cloudy” from the back, it indicates moisture is trapped between the glass and the adhesive, a sign of poor bond coverage.
Common Misconceptions and Strategic Errors
-
“I can use bathroom tile in my pool.” Bathroom tile is not “frost-proof” or “acid-resistant.” Pool tile must be rated for constant immersion and specific chemical loads.
-
“Thicker grout lines are safer.” In a pool, grout is the weakest link. The “best” plans minimize grout width (ideally 1/8th inch) to reduce the surface area vulnerable to chemical erosion.
-
“Dark tile makes the water warmer.” While true at the waterline, the effect on total pool temperature is negligible compared to a solar cover or a heat pump.
-
“You can tile over old tile.” This is almost always a failure. The new bond is only as good as the old bond. If the old tile fails, the new tile goes with it.
Conclusion
The successful execution of pool tile installation plans is an exercise in “Defensive Engineering.” It is the recognition that the environment is fundamentally hostile to man-made materials and that only a rigorous, layered approach to waterproofing and adhesion can ensure longevity. As we move toward more complex, “invisible” pool designs, the role of the tile installer has shifted from a craftsman to a technical specialist.
Ultimately, the goal of a premier aquatic finish is to provide a sensory experience that masks the industrial reality of the pool shell. By prioritizing the invisible layers—the membranes, the primers, and the epoxy chemistries—homeowners can ensure that their investment remains a sanctuary of light and water for decades to come. The beauty of the tile is the reward for the discipline of the preparation.