How to Plan Coping Repair on a Budget: The Definitive Guide
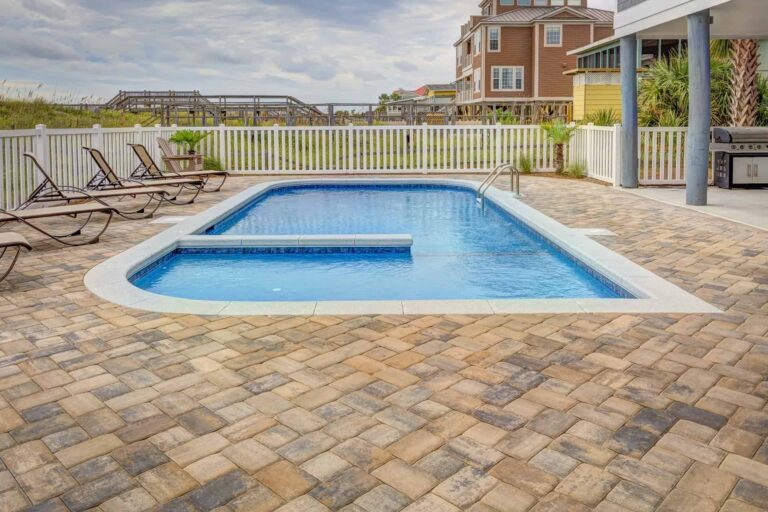
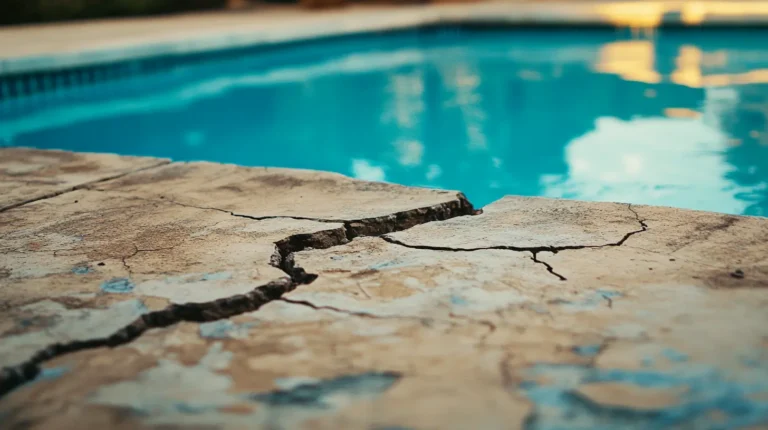
The perimeter of a swimming pool serves as more than a decorative transition between the water and the deck; it is a critical structural capstone. Pool coping—the material used to finish the top edge of the pool wall—protects the bond beam from water infiltration, provides a safe handhold for swimmers, and integrates the vessel’s aesthetics with the surrounding hardscape. When this component begins to fail, whether through cracking, delamination, or mortar deterioration, the implications extend far beyond the visual. How to Plan Coping Repair on a Budget. Left unaddressed, compromised coping can lead to significant structural degradation of the pool shell and the surrounding decking.
In the current economic climate, property owners are increasingly tasked with balancing essential infrastructure maintenance against fiscal constraints. The challenge of aquatic renovation is that the “cheapest” fix often ignores the underlying cause of the failure, leading to a cycle of repetitive and increasingly expensive repairs. To truly navigate this process effectively, one must treat the renovation not as a cosmetic touch-up, but as a forensic engineering project. Success lies in identifying the precise failure mode—be it soil movement, freeze-thaw cycles, or chemical erosion—and applying a targeted solution that maximizes the lifespan of existing materials.
Strategic planning is the primary tool for cost containment. By understanding the distinction between structural failures and superficial wear, a homeowner can prioritize interventions that stabilize the vessel without requiring a total overhaul. This involves a nuanced approach to material salvaging, mortar chemistry, and the strategic timing of labor. This article serves as a definitive reference for those seeking to achieve professional-grade results while adhering to a disciplined financial framework.
Understanding “how to plan coping repair on a budget”
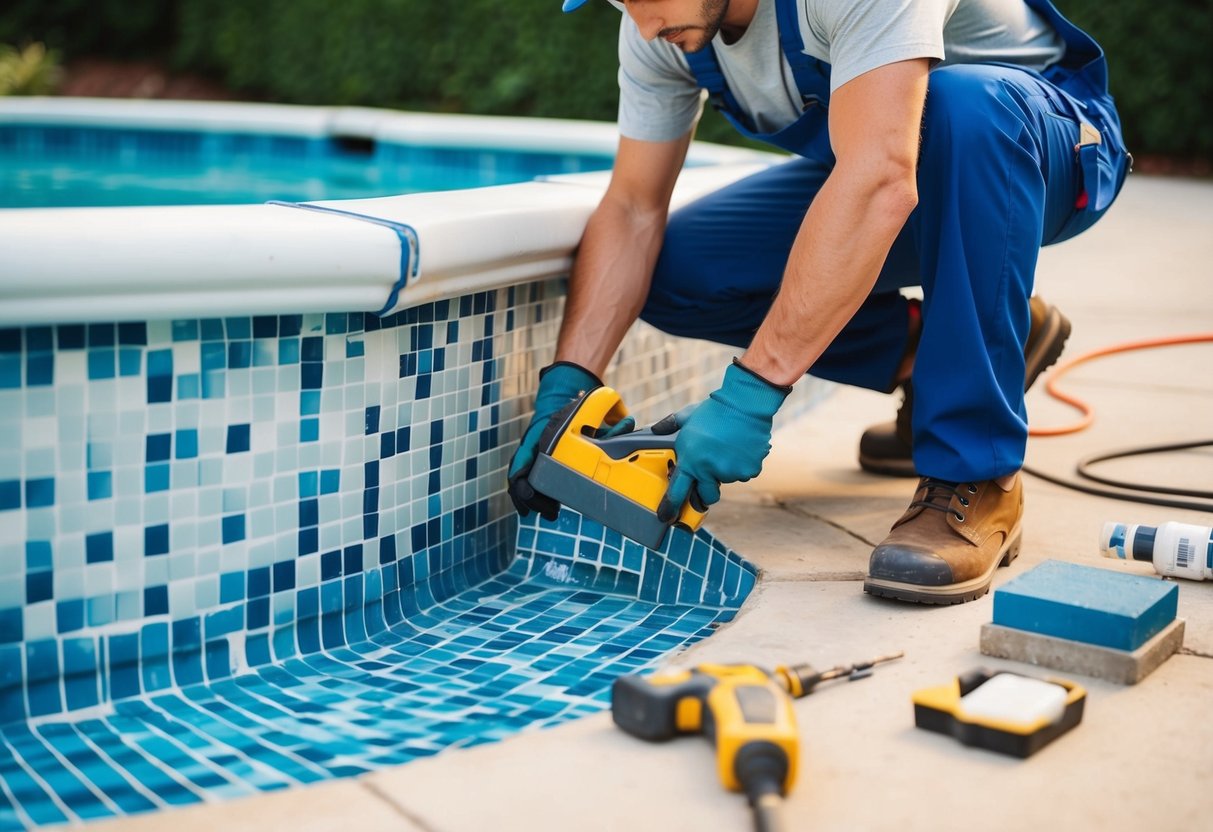
Mastering how to plan coping repair on a budget requires a departure from the “replace all” mentality that dominates the commercial renovation industry. In many instances, contractors will suggest a total removal of the coping and tile line as a default position because it is easier to bid and execute. However, a budget-conscious strategy focuses on “surgical” repair. This involves identifying the specific stones or bricks that have “hollow” sounds when tapped—indicating a break in the bond—and resetting only those units rather than the entire perimeter.
A multi-perspective view of this process identifies three primary tiers of intervention:
-
Bond Beam Stabilization: Before any aesthetic repair can occur, the underlying concrete (the bond beam) must be sound. If the beam is cracking, the most expensive coping in the world will fail within two seasons. A budget plan allocates funds here first.
-
Material Reclamation: Many luxury coping materials, such as Oklahoma flagstone or cast stone, can be cleaned and reused. The “scam” of budget renovation is often the disposal of perfectly good stone in favor of cheap, new concrete pavers.
-
Expansion Joint Management: The most common cause of coping failure is a lack of a functioning expansion joint between the coping and the deck. Fixing this $500 problem often prevents $5,000 in stone damage.
Oversimplification in this field leads to “patching” with the wrong mortar. Using high-strength Type S mortar on a soft natural stone can cause the stone to shatter during thermal expansion. A professional-grade budget plan respects material compatibility, ensuring that the repair lasts as long as the original installation.
Historical Context: From Poured Concrete to Natural Stone
The evolution of pool coping in the United States mirrors broader trends in residential architecture and material science. In the mid-20th century, the “Cantilevered Deck” was the standard. This involved pouring the concrete deck directly over the edge of the pool. While cost-effective, these systems lacked a dedicated coping line, meaning a crack in the deck was a crack in the pool. By the 1970s and 80s, the industry moved toward “Safety Grip” brick and pre-cast concrete coping, which provided a separate structural unit that could move independently of the deck.
The luxury boom of the late 90s introduced natural stones like travertine, limestone, and granite. While these materials are aesthetically superior, they introduced new failure modes related to porosity and salt-water compatibility. Understanding this history is vital for a budget repair because it dictates the “DNA” of the existing structure. If you are repairing a 1980s brick pool, the repair logic is mechanical and modular; if you are repairing a 2010s travertine pool, the logic is chemical and focused on sealing.
Conceptual Frameworks and Mental Models
To manage a renovation with precision, professionals rely on these mental models:
-
The “Floating Cap” Model: This framework treats the coping as a separate entity that “floats” on the bond beam. Its purpose is to shed water away from the pool wall. If the coping is pinned too tightly to the deck, it will “buckle” as the deck expands in the sun.
-
The “Hollow Sound” Diagnostic: A simple but effective model for assessing bond integrity. By dragging a metal rod or tapping a hammer across the coping, the pitch changes when a void exists beneath the stone. This allows for precise mapping of repair areas.
-
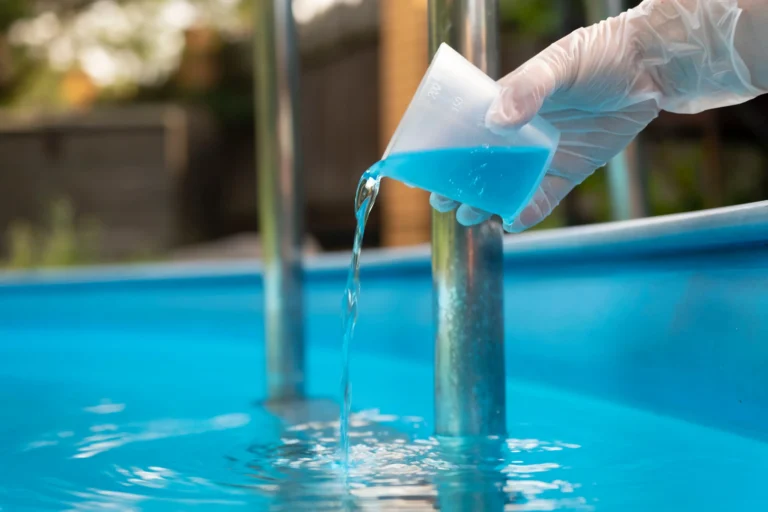
The “LSI” Compatibility Framework: For natural stone repairs, the chemical balance of the pool water (Langelier Saturation Index) must be considered. If the water is “hungry,” it will eat the new mortar before it has a chance to fully cure.
Key Categories of Coping and Repair Methods
The path to a budget repair varies significantly based on the existing material.
| Coping Type | Failure Mode | Budget Strategy | Trade-off |
| Brick / Paver | Mortar pop-outs; loose bricks. | Remove, clean, and reset individual bricks. | Labor intensive; color matching old mortar is difficult. |
| Natural Stone | Spalling (flaking); cracking. | Patching with color-matched epoxy or stone dust. | Not a “forever” fix for structural cracks. |
| Pre-Cast Concrete | Surface erosion; delamination. | Pressure wash and apply a high-quality masonry stain. | Cosmetic only; does not fix underlying crumbling. |
| Cantilevered Concrete | Nose-edge cracking. | Grinding down the edge and applying a “Cool Deck” overlay. | Significant dust; requires specialized equipment. |
Realistic Decision Logic
If more than 40% of the coping is “hollow,” the labor cost of individual resets will eventually exceed the cost of a total replacement. In this scenario, the “budget” move is to replace everything with a durable, low-cost material like pre-cast concrete bullnose, which offers a 20-year lifespan for a fraction of the price of natural stone.
Detailed Real-World Scenarios How to Plan Coping Repair on a Budget
Scenario 1: The “Deck-Push” Failure
A pool where the concrete deck has expanded and pushed the coping into the water.
-
The Constraint: The homeowner cannot afford to replace the deck.
-
The Strategy: Use a diamond-blade saw to cut a 1-inch expansion joint between the coping and the deck. Remove the pushed stones, grind the bond beam flat, and reset them.
-
Result: The “pressure” is relieved, and the coping is stabilized without touching the deck.
Scenario 2: The Spalling Travertine
A salt-water pool where the natural travertine is flaking off in layers.
-
The Constraint: Total replacement is too expensive ($10,000+).
-
The Strategy: “Sanding and Sealing.” Use an orbital sander to remove the loose layers, fill large voids with a travertine-dust/resin mixture, and apply a high-grade salt-shield sealer.
Planning, Cost, and Resource Dynamics
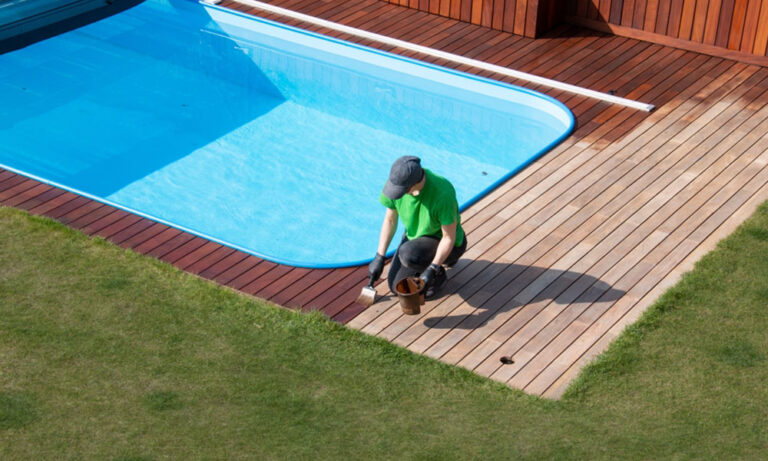
The primary driver of cost in coping repair is not the material, but the “prep work.” Removing old mortar from the bottom of a stone is a tedious task that contractors charge for by the hour.
| Expense Item | DIY / Low-End Cost | Professional Cost | Savings Potential |
| Mortar & Additives | $50 – $150 | $300 – $600 | High (Material only). |
| Masonry Saw Rental | $75 / Day | Included in Labor | N/A |
| Labor (Resetting) | $0 (Self) | $25 – $60 / Linear Foot | Extreme. |
| Caulking (Expansion Joint) | $100 – $200 | $500 – $1,200 | High (Easy to DIY). |
Opportunity Cost: Choosing a cheap, non-waterproof mortar to save $20. Standard masonry mortar will absorb water, freeze, and pop the stones off again in twelve months. The “budget” choice is always a polymer-modified thin-set or a waterproof masonry mix.
Tools, Strategies, and Support Systems
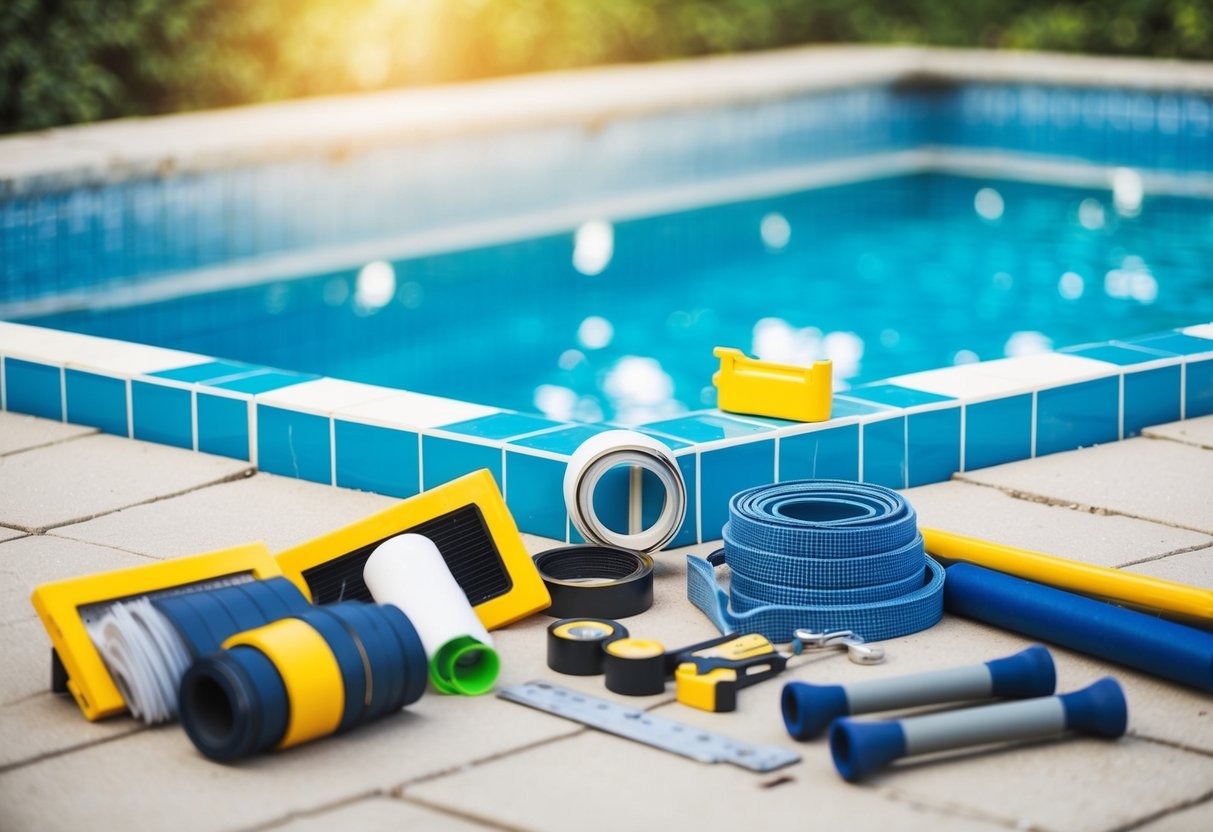
A successful repair requires specific tools that go beyond a standard home toolkit:
-
Angle Grinder with Diamond Blade: Essential for removing old mortar and cleaning the “shoulders” of the stone.
-
Rubber Mallet: Used to “seat” the stone without cracking the surface.
-
Bonding Agent: A liquid primer (like Weld-Crete) that ensures new mortar sticks to old concrete.
-
Backer Rod: A foam strip used to fill the expansion joint before applying mastic.
-
Muriatic Acid (Diluted): Used to “etch” the bond beam to provide a mechanical key for the new bond.
-
Color Pigments: Critical for matching the new mortar to the aged, weathered mortar of the remaining sections.
Risk Landscape and Failure Modes
The primary risk in how to plan coping repair on a budget is misdiagnosing a “Bond Beam Crack” as a simple “Loose Stone.”
-
Structural Compounding: If the concrete wall of the pool is split, resetting the stone is purely cosmetic. Within weeks, the crack will telegraph through the new mortar.
-
Chemical Interference: If the pool is not drained below the tile line during repair, the splash-out of pool water will introduce chemicals that prevent the mortar from curing.
-
Vibration Damage: Using a jackhammer to remove one loose stone can often vibrate the next three stones loose, creating a “cascade” effect that balloons the project scope.
Governance, Maintenance, and Long-Term Adaptation
Once a repair is completed, its survival depends on a “Governance Checklist”:
-
The “Tap Test” (Annual): Every spring, walk the perimeter and tap the coping. Early detection of a loose bond allows for a 15-minute fix before water enters the gap.
-
Expansion Joint Inspection: Ensure the mastic (the rubbery caulk) hasn’t dried out or pulled away. If water can get behind the coping, the bond is doomed.
-
Winterization: In cold climates, ensuring the pool water level is below the tile/coping line prevents ice from “heaving” the stones.
Measurement, Tracking, and Evaluation
How do you evaluate a “budget” repair?
-
Leading Indicator: The absence of “efflorescence” (white salt deposits) on the new mortar joints, which indicates a watertight seal.
-
Lagging Indicator: The repair surviving a full freeze-thaw cycle without any new “hollow” sounds.
-
Documentation: Keep a photo log of the bond beam before the stones were reset. If a crack reappears, you will know if it followed the old line or created a new one.
Common Misconceptions and Strategic Errors
-
“I can just use Liquid Nails.” Construction adhesives are not designed for submerged or high-moisture masonry. They will fail as soon as the stone undergoes thermal expansion.
-
“Mortar is just sand and cement.” Modern pool mortars contain acrylic resins and polymers that allow for slight flexibility. Using “bagged” concrete mix from a big-box store is a recipe for a 1-year failure.
-
“The coping and the deck should be touching.” This is the most common error in pool building. They must be separated by a flexible joint to allow for independent movement.
-
“Natural stone is more durable than concrete.” In a pool environment, high-density pre-cast concrete is often more durable than porous stones like limestone or low-grade travertine.
Conclusion
The structural integrity of a pool’s perimeter is a testament to the balance between material science and mechanical planning. When a property owner seeks to address failures in this area, the goal should be “stabilization through precision” rather than “renovation through volume.” By applying the frameworks of bond beam health, material reclamation, and expansion joint management, it is entirely possible to restore a pool’s edge to professional standards without an exhaustive financial burden. The ultimate “budget” strategy is one that understands the physics of the vessel—accepting that water, heat, and movement are the primary architects of decay, and that a well-placed joint is worth more than a mile of decorative stone.